
The User Import functionality within the Admin Interface provides an easy way for you to add and update your Users in bulk. This article details the standard User Import tool available in the SkillSync Admin Interface. If you're looking for information on historical or scheduled data import services, please see our Data Imports article.
- For more information on .csv files, see What Is A CSV File.... It covers how to save a CSV file for importing Users, and what a CSV is.
- Important: The User Import ignores the first row of the .csv file and shifts the lines forward/up one row. This is important for lining up information in error messages that call out specific line numbers/items.
Import Batching
SkillSync takes performance seriously, so we group large volumes of changes together and process them at 10 minute intervals more efficiently than one at a time. This has the potential to introduce a short delay before you see the results, but ensures that your portal is more responsive to one-off Admin actions and Learner activities.
Creating a CSV File
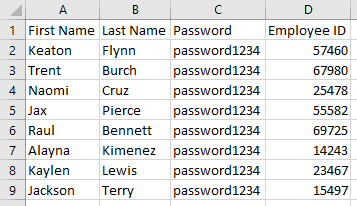
Before upload, remember to add a single row at the beginning of the table to ensure you are looking at the correct User data. This will be useful in the event that any error messaging is returned when uploading the file.
- The First Name, Last Name, and Password columns are required for new User Import (the Password column can be removed if you are updating existing Users).
- The order of the columns is irrelevant and can be changed/altered, without affecting the validity of the import file.
- While the Email Address and Gender fields are not required to import Users, if your .csv file has columns for these fields, the system will perform a formatting check on the cells in these columns, which blank values will fail. As such, you may need to split your CSV into multiple files if you have some Learners with values for these fields, and others without.
-
When the Update Existing Users option is enabled (toggled ON), new Users can be included, but First Name, Last Name and Password will be required for the whole file. Blank values for First Name and Last Name will overwrite current values for existing Users, however the Password field can't be overwritten via a User Import, and can be left blank.
Please note that the upload will not check for data integrity (for example, if an Email Address is a valid Email Address, please review your data carefully).
Available Fields
The following fields are available to be imported via the Admin Interface are:
- Status
- Username
- Middle Name
- Gender
- Language (for a full list of SkillSync's Language codes click here)
- Address
- Address2
- City
- State/Province (if this in your CSV file, Country must also be present)
- Country
- Zip/Postal Code
- Phone
- Employee Number
- Location
- Job Title
- Notes
- Date Hired
- Termination Date
- External ID
- Custom Fields
Please note: The "Username" field cannot be bulk updated using the User Import feature. This field is not updatable through an import process.
Date Format for Importing Users
When importing Users, the only supported date format is YYYY-MM-DD. Please note that using any other format is not currently supported, and we cannot guarantee that the User Import will complete successfully if another date format is used.
SkillSync Country and State/Province Codes
Under the Attachments section on the right side column of this article is a file that contains a list of both acceptable Country code values and State/Province code values. These codes mirror the ISO 3166-2 list of standardized values for these attributes.
Country and State/Province codes are managed manually by SkillSync, based on the ISO 3166-2 standards. For more information about this standard, review the following Wikipedia article:
SkillSync aims to keep up to date with international name standard updates, if you notice any of our Country name data is out of date. Please feel welcome to submit a support ticket or reach out to your client support representative to discuss the matter.
Unavailable Fields
The following fields cannot be included in the Import:
- Supervisor
- Avatar
- CC Email Addresses
The Supervisor, Avatar, and CC Email Addresses must be updated manually through the Users Report.
Additional Fields / Settings
Additional Fields are available during the import process. The difference between the information you provide in the .csv and the Additional Fields is that additional fields will be the same for all users in the import.
The available additional fields are:
- Department
- Roles
- Learner
- Admin
- Instructor
- Language
- Country
- Province
- City
- Location
- Job Title
- Date Hired
- Date Terminated
- Notes
- All Custom Fields
Boolean Fields
If the value for a field expects a boolean response, you may use either of the following values for this field:
- 0 or false
- 1 or true
Keep in mind that you must use a consistent syntax for boolean values. Don't mix and match the usage of 0/1 or false/true.
Minimum Amount of Valid Fields for New User Import
When uploading a CSV file for the purposes of User Import, the following fields represent what is absolutely mandatory to pass validation and successfully import new Users:
- First Name
- Last Name
- Password
If you are preparing a template to be referenced for future User Imports using a CSV file, it can be beneficial to start with the minimum number of fields and then slowly add more, until the full scope of data is being included and successfully validated by the User Import tool.
Mutually Dependent Fields
When preparing a CSV file for User Import it is important to make sure that the fields included are not dependent on another set of missing information.
A common example of mutually dependent fields would be State/Province and Country. If you include a value for the State/Province field without including the Country field for the Users an error will be produced when uploading the CSV because State/Province requires Country to be included.
Uploading a CSV File
-
Navigate to the Users Report and select the User Import button from the top or side bar
-
Select the .csv file you created from the File Manager or upload a new one.
Mapping the User Fields
Once you have successfully uploaded your file, you will be presented with several options that will determine how the imported data will be used.
-
Select the Username format using the LMS Username drop down menu. You can choose from any of the fields that are included in your CSV (ie. like Email Address, or by combining the FirstName.LastName entries together)
- For consistency, be sure to format Usernames the same as existing Users.
- It is not possible to update the LMS Username via the Import.
- Choose whether you wish to Update Existing Users that already exist in your LMS with the imported data. Enabling Update Existing Users will update/replace data in existing Users. If not enabled, all data will be imported as new Users. Proceed with caution here.
-
If Updating Existing Users, match the Link Spreadsheet Field with the fields available in the to LMS Field drop down.
- Enabling Send New User Email will email your portal's New User Message Template to all the new Users that are being created by the import. Updated Users will be omitted.
-
Next, you will see the Source Data Preview. This will show you the top 5 records in your document to aid in selecting the appropriate SkillSync field to map to. The LMS will attempt to intuitively auto-match your column headers with SkillSync fields, but this can be manipulated using the drop-down menu below each header. Review each column and the mapped SkillSync field, add and alter as necessary.
Additional Data
Below the Source Data Preview section, you'll find an expandable Additional Data section. This area allows you to specify additional data that will apply to all Users being imported.
- Check off the fields that you want to include in the import.
- Select or enter the relevant data.
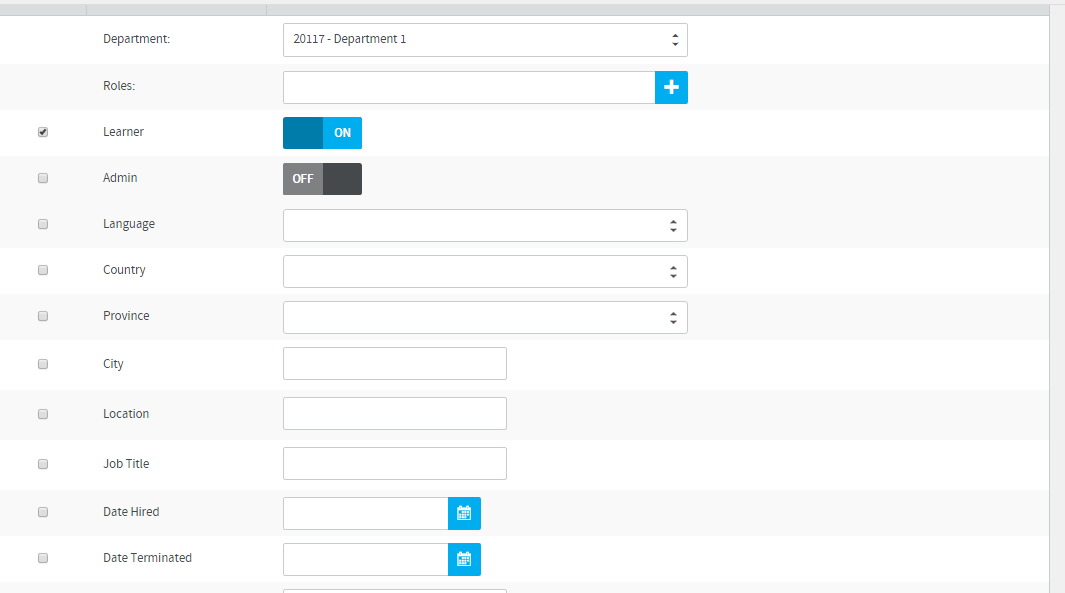
You are able to select if Users import as Active or Inactive. The Inactive Status is useful if you want to import the Users ahead of time or have additional setup to do before allowing them access to the LMS. The imported Users will not be able to log in to the LMS unless their Status is Active.
- Imports can only include one Department at a time. If you wish to import multiple Users into various Departments you will have to split the imports up into their respective Department and select it in the Additional Details. You can also change the Department after the Users are uploaded.
- If you have a Blended Billing Model, a tool tip will state whether the Department you've selected has Internal or External Billing applied. Please ensure you have selected the correct Department and the Department has the expected Billing Type.
Validation
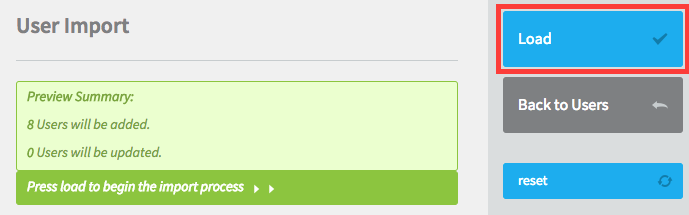
Once the Mapping and Additional Data has been reviewed and confirm, select the Validate button. During validation any data conflicts will be shown as errors (including the row number). The data will need to be corrected by altering the .csv file or by adjusting the mappings. If no conflicts are found, you'll be shown the total amount of Users that will be created and updated. Click on Load once you are ready to have all Users added to your portal.
Comments
0 comments
Article is closed for comments.